

April 10, 2026
How to Create a QR Menu: A Step-by-Step Setup and Usage Guide
The dining room is full on a Friday night, servers can't keep up with handing out menus, and the new dessert from the kitchen still isn't on the menu because reprinting costs money and takes time. That was exactly the problem for the owner of a 14-table cafe: a printing bill on every price change, stained card menus, and no way to show seasonal items. The solution looked simple, but how to set it up was unclear. In this guide we won't explain what a QR menu is; we'll walk you through how to build one from scratch and how to use it in your restaurant, step by step.
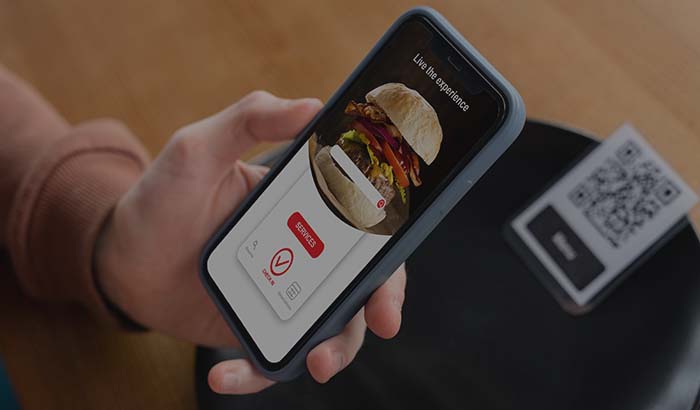
A QR menu is a digital card the guest reaches by scanning the square on the table with their phone, viewing the menu on their screen and browsing it without calling a server. Set up correctly, it doesn't just bring your printing cost to zero; it lets you update an item in one click, add photos, and if you want, connect it to a commission-free online ordering channel. So it becomes a tool that sells, not just a card menu.
Follow the six steps below and in half a day you'll move your menu to digital, place QR codes on your tables, and take your first order through your own channel. A QR menu built with RestApp runs in the same panel as your order ticket and cloud POS system; you enter the menu once and it's used automatically both in the dining room and in the dine-in ordering flow. If you want a refresher on the basics, the what is a QR menu article is a good place to start.
Step 1: Open your account and enter your business details
The first task is setting up the panel that will host the QR menu. After opening an account with RestApp through start free, you enter basic details such as business name, type (cafe, restaurant, bakery, fast food), branch address and operating hours. This information appears in the header of your menu page and is also used for address verification if you offer delivery.
Choosing the right business type matters, because the panel then suggests templates and categories suited to that segment. For a cafe, hot drinks and desserts come to the front, while for a bakery a bakery and pastry menu layout is more appropriate. If you pick the wrong type, no problem, you can change it later from settings.
At this stage you also upload your logo and brand colors. The QR menu carries your brand, not a marketplace look; the guest sees your logo and your colors on their phone. That small detail is what separates a digital menu from a cheap PDF.
Step 2: Upload your menu categories and items

Now we build the skeleton of the menu. First create the categories: Starters, Main Courses, Drinks, Desserts and so on. You can reorder them by drag and drop; putting your best-selling category at the top directly lifts sales. Then add items to each category one by one: item name, description, price and a photo if you have one.
Don't skip the item description. Writing "grilled chicken, parmesan, crispy croutons and house Caesar dressing" instead of "Chicken Caesar" increases orders, because the guest decides without asking a server. Adding a photo lifts conversion sharply, and the difference is clear especially on visually appealing items like desserts and burgers. All of this content is stored in the digital menu structure and used at the same time across both the QR and online ordering channels.
Portion options, extra ingredients (double patty, extra cheese) and allergen notes are also entered in this step. If you also want recipe and cost tracking, you can link the ingredient list while entering items; that way, with recipe and cost management, you see the profit on every sale. Set the menu up properly once and you keep adding to it for years.
Step 3: Generate QR codes and map them to tables
Once the menu is ready, the panel generates your QR codes automatically. There are two basic uses: a single general QR (every table scans the same code) or a table-specific QR (each table has its own code). Prefer the table-specific QR, because when the guest scans the code the system knows which table the order came from, and the dine-in order drops directly onto that table's order ticket.
You define tables in the panel: Table 1, Table 2, garden, terrace, bar and so on. A separate QR is generated for each table. You download these codes in high resolution and print them on a table stand, a sticker, or the corner of the menu card. A practical tip: add the text "Scan to view the menu" under the QR; it removes hesitation for older guests.
You can use the QR menu not only for the dining room but for delivery and pickup too. A QR printed on the door, the window, or the bag you hand to a courier takes the guest to your pickup ordering page. So a single menu feeds three different order types, and all of them run commission-free.
Step 4: Configure the order and payment flow
If you want to turn the QR menu from a card that's merely "looked at" into a channel that "takes orders," you enable the order flow. There are three modes: view only (the guest looks at the menu and calls a server), order from the table (the guest selects on their phone and it drops to the kitchen) and commission-free online ordering (with payment, for delivery and pickup). Depending on your restaurant's style, you can enable one or all of them.
When you enable ordering from the table, the order the guest places on their phone drops instantly onto the kitchen display system (KDS), and the step where the server takes the order and relays it to the kitchen disappears. This brings both speed and accuracy during busy hours; mis-taken orders drop to zero. The order appears at the same time on the order ticket and cloud POS panel, and closing the check is done from a single screen.
If you want to take online payment, you activate the online payment module; the guest pays by card at the table or on a delivery order, the money comes straight to you, and no marketplace commission is deducted. If you deliver, you define delivery zones and assign a minimum order amount and fee to each zone.
Step 5: Update the menu live and adapt it to the season
Here is the QR menu's biggest advantage: a change is reflected instantly. When an item runs out you mark it "sold out," the guest no longer sees that item, and there's no disappointment. When a price increase comes, you change a single field and the menu on every table updates within seconds. No printing, no waiting, no stains.
You also manage seasonal campaigns from the menu. You can prepare sets in advance, such as a summer menu, winter hot drinks, or holiday desserts, and publish them when the date arrives. Highlight areas like "menu of the day" or "chef's recommendation" help you quickly sell an item you have in surplus during the day. This flexibility was impossible on a card menu.
To bring guests back, you connect loyalty and promotions tools to the menu. You set points for the guest who scans the QR, a discount on the second order, or a birthday coupon. And you watch live which item sold when and how much from the cloud reports screen, shaping the menu with data.
Step 6: Test it, place it on the table and train the team
Before going live, scan the QR with your own phone and check it from the guest's point of view: are the categories in the right order, are the prices current, are the photos loading, is the order flow smooth? Place a test order from a table and see whether it drops onto the kitchen display. This five-minute test prevents the confusion you'd otherwise face on opening day.
If everything checks out, you place the QR stands on the tables. Put them somewhere visible, ideally in the center of the table; a QR left in the corner goes unnoticed. Since the content is what changes and not the QR itself, the code is fixed; you print the stand once and it stays the same for years.
The last step is training the team. Show servers how to help if a guest can't scan the QR, where an order from the table lands, and how closing the check works. Because the whole panel works on a single logic, it's easy to learn; whether they use the QR e-menu side or take a server order with the order-taking app, everything meets on the same order ticket. To clarify your budget, you can compare plans on the pricing page.
Key takeaways
- QR menu setup finishes in six steps: open an account, upload the menu, generate QR codes and map them to tables, configure the order and payment flow, update, then test and place on the table.
- Use a table-specific QR; when the guest scans, the order drops directly onto that table's order ticket and the kitchen display, and server errors are eliminated.
- The menu is entered in one place; the same content is used automatically across the QR, dine-in ordering and commission-free online ordering channels.
- Live updates bring printing costs to zero: 'sold out' when an item runs out, a single field when a price changes, a scheduled launch when a campaign comes.
- The entire flow runs on your own commission-free channel; while a marketplace takes 15 to 35 percent commission, the order coming from your QR menu stays in your pocket.
Frequently asked questions
How long does it take to create a QR menu?+
If your menu content (items, prices) is ready, half a day is enough. Opening an account with RestApp takes minutes; the real time goes into entering items by category. Adding photos and descriptions stretches it a bit, but you do this once and after that you only update.
Do I need to buy a separate device or software for the QR menu?+
No. The guest scans the QR with their own phone and doesn't need to download an app; the menu opens in the browser. You manage the menu from the panel. If you want, you use the order ticket and cloud POS side of the same system on a tablet or phone, but extra hardware isn't required.
Can I change the menu after the QR code is printed?+
Yes, the QR code is fixed and only the menu content behind it changes. You update the price, item or photo from the panel, the QR on every table keeps scanning the same code but shows the new content. So you print the stands once and use the same ones for years.
Can the guest order directly from the QR menu?+
Yes, if you want. In view-only mode the guest looks at the menu and calls a server; in order-from-the-table mode they select on their phone and the order drops straight onto the kitchen display. You can also add online payment for delivery and pickup, so you sell through your own commission-free channel.
How does a QR menu save you from marketplace commission?+
Marketplaces like Uber Eats or Deliveroo take 15 to 35 percent commission on every order. Because the QR menu is your own channel, the guest orders directly from you and payment comes straight to you. As you get guests used to your own channel with loyalty tools, the money that would have gone to commission stays in your pocket.
Stop paying commission on your orders
Launch your own commission-free online ordering system with RestApp.